I woke up at 5am to help Kathy get ready for work. We have coffee and chat with CNN in the background, while she gets dressed. We have a new pit-bull puppy named Max, that's excited about everything. Max is a classic pit, very determined but unusually smart. If I discipline him and take the time to make sure he understands he gets it and corrects the behavior. He is teething which is always a challenge, but is sticking mostly to toys and bones. This morning I opened an e-mail from my friend Jerry Cohen who is traveling in Laos. I was inspired by his writing and pictures and decided to open a link to my blog, check out his link Ho Chi Minh's Used Cars. I was saddened when I saw that it had been months since my last post. I got a little lost with my writing around the time we said goodbye to Micha.
I've spent the summer building a wood-fired oven. Below is a quick walk through the steps for the build. I plan on getting a more complete set of plans and directions for you to build your own oven. If I can do it so can you. As some of you know I have some health challenges but I tried to get a little done every few days and brick by brick I've gone from plans to Pizza.
This shot is of the walls and the pour forms for the insulated hearth slab.
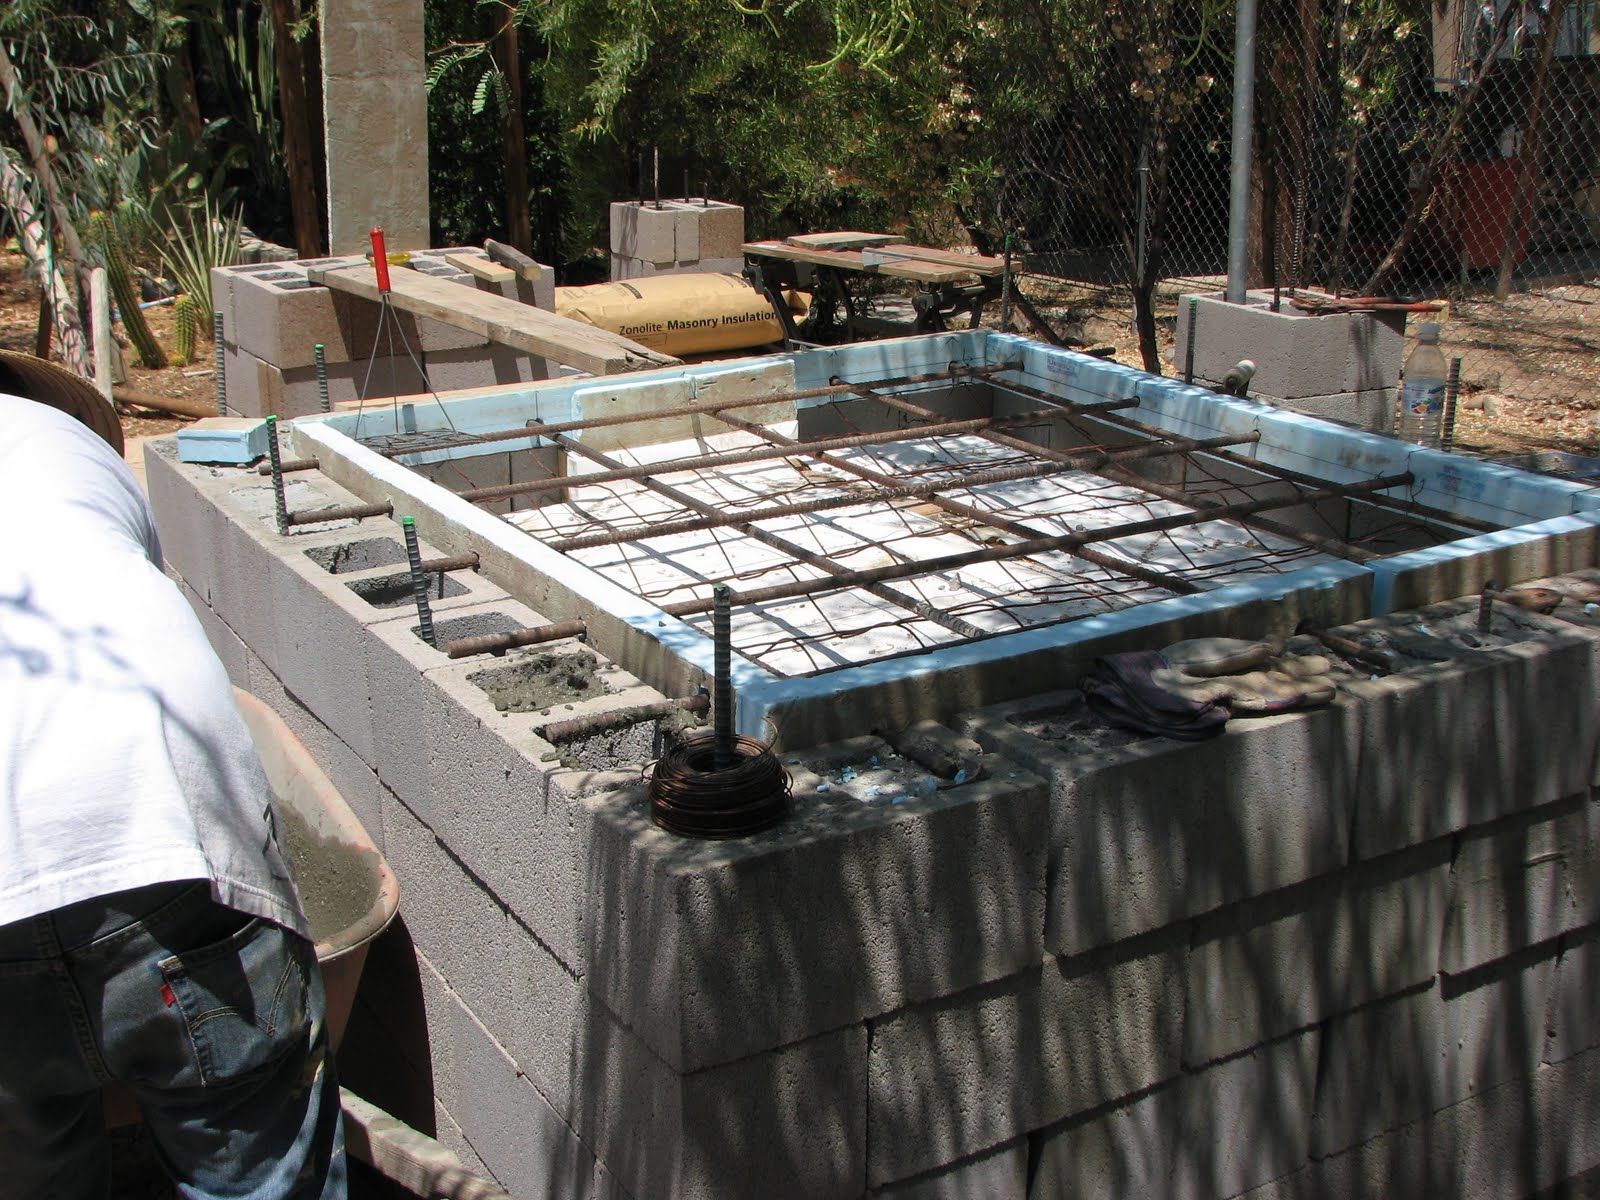
There are two layers of concrete, the bottom is insulated concrete, to hold in the thermal mass of the upper slab which is just sack mix concrete, notice the blue foam above that keeps the upper slab from touching the walls. This allows for expansion without cracking the walls, as the hearth heats up.

Wire mesh is bent to tie the two slabs together then tied to the rebar.

The hearth slab is supported by the rebar.

One of the most important bits of information that I have learned while building this oven is to mock up, stop, look and think, before setting in mortar. The shot above shows a hearth and oven wall mock up made with refractory. After looking at this I decided to do the walls with fire brick for more thermal mass. I'm glad I thought this out.

By mocking up the firebrick walls I could see how the layout would work. Below I used foam (it was free, use what you have on hand) to see the arch and as a guide while mortaring the bricks.
the

A mock up of the oven door opening.

Time for mud!

Use shims to follow the curve while the mortar sets.

Lots of shims!


The mortar coat holds the firebrick together and acts as additional mass.


The basic oven.


Then covered with wire mesh. Notice the pieces of brick used to set the mesh in the middle of the cement.


I used foam and old boards to make my forms. It was crude but saved a lot of money. It comes down to time vs. dollars. I have more time. Proir to pouring the second layer of the oven light a small fire and let it burn for a few hours to allow the oven to expand. Then pour, this will keep the oven from cracking as it expands from use.


Use what you have on hand like this strap in case of wind as the flue pipe set!


The oven opening and arch. There are formulas that need to be followed for proper heating and flow of ash and smoke. E-mail me if you have questions or come to an oven building workshop.

Worth the wait!

 The oven is far from finished but we can start baking. Much more to come!
Hey Joe it's Joe from the C-4, Are you ready for for more jerky?? Also I would like to get your opinion on this pork rub we've developed... I Like Your Site. I miss seeing you on Sonoran Grill, your more fun than than the Folks at the Food Network
ReplyDelete